Outlook 2002 Email Setup Guide
Posted on June 22nd, 2004 by Gabriel HarperThis guide explains how to configure a new IMAP email account in MS Outlook 2002.
Before beginning, be sure to have the following information available:
- Incoming and outgoing mail server addresses
- Email address / login name
- Password
This guide refers to “www.yourdomain.com”, which should be replaced with the domain name you receive email with.
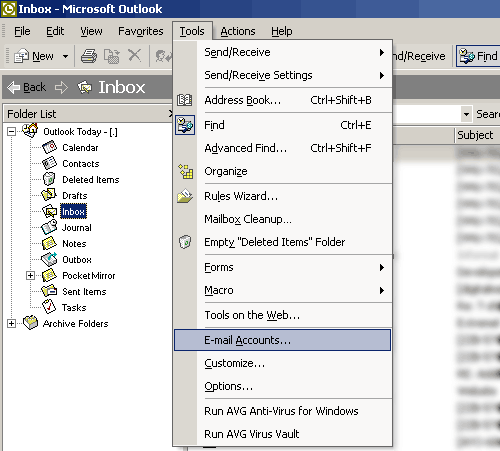
Step 1: Open Outlook and go to Tools Menu -> Email Accounts
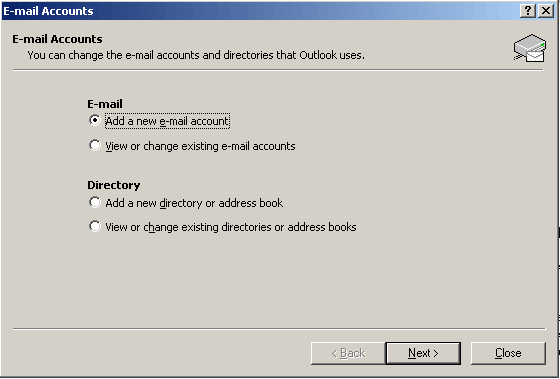
Step 2: Select “Add a new e-mail account” and click Next.
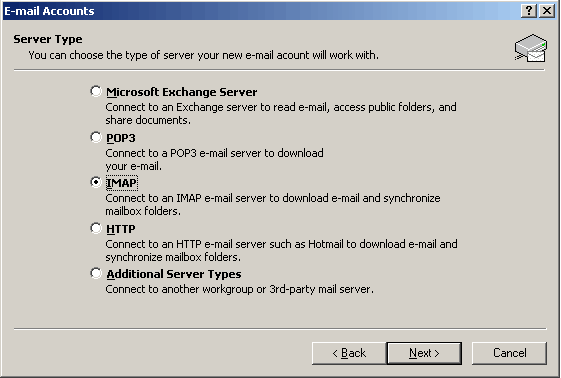
Step 3: Select IMAP from the list, and click Next.
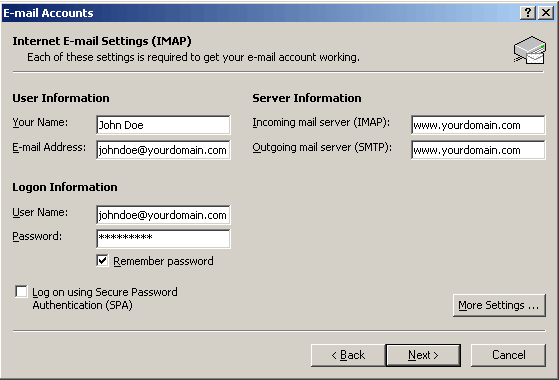
Step 4: Enter your display name, email address, the incoming and outgoing server names, your login name, and password. When finished, click on “More Settings” to configure IMAP for your mail servers.
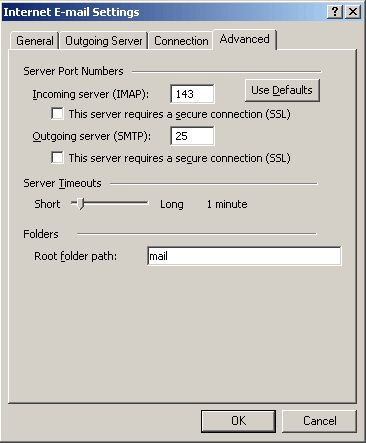
Step 5: Go to the “Advanced” tab and type “mail” (without quotes) into the “Root folder path” field. Click Ok when finished.
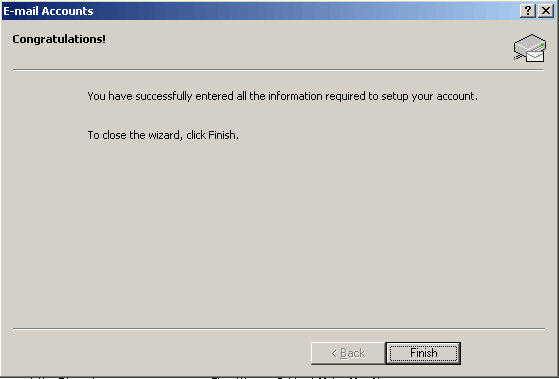
Step 6: Click Next, and you should be greeted with a “Congratulations!” dialog. Click Finish to complete the account creation.
Step 7: Make sure that your new account is visible in the Folder List in Outlook.

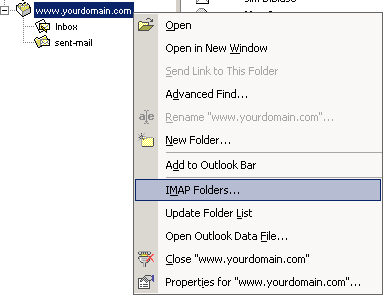
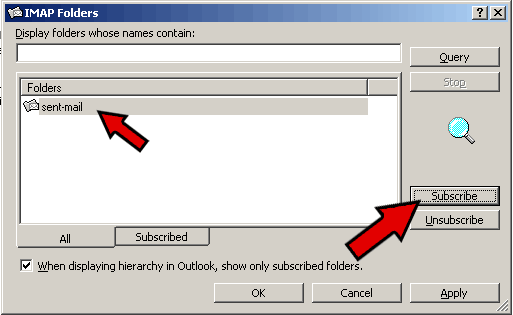
Step 8: Right click on the account name in your Folder List, and select “IMAP Folders”.
Step 9: Click the “Query” button to retrieve a list of available folders.
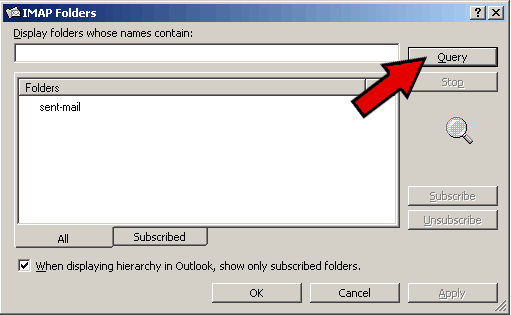
Step 10: Select the folder titled “sent-mail”, and click the “Subscribe” button to the right. Click Apply, then OK to finish.
Step 11: Your Folder List view should now list the sent-mail folder in your new account.

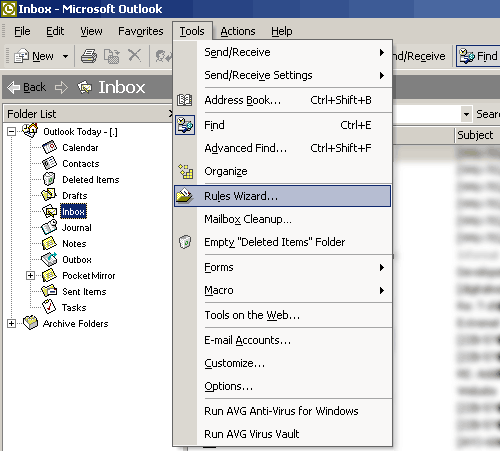
Step 12: Now we will create a new Rule to save a copy of sent mail in our sent-mail folder for later reference. Go to Tools Menu -> Rules Wizard.
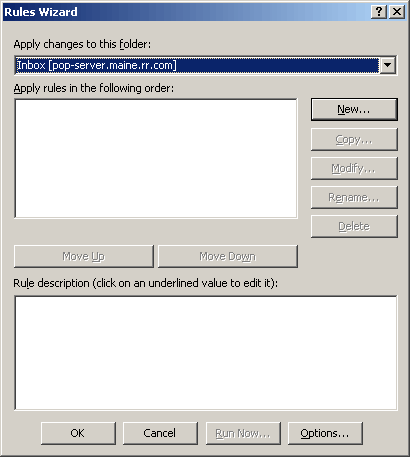
Step 13: From the drop-down list, select your PRIMARY INBOX. This is the Inbox located under Outlook Today in your Outlook Folder List. You may already receive email in this folder from another POP account, but we must select this Inbox for our rule to work correctly. Once selected, click “New” to start building our new rule.
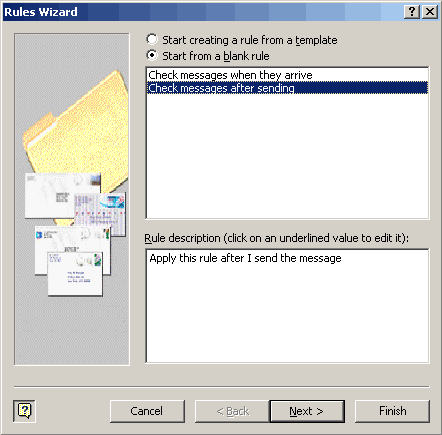
Step 14: Tick the “Start a new rule” box, and highlight “Check messages after sending”. Click the Next button to continue.
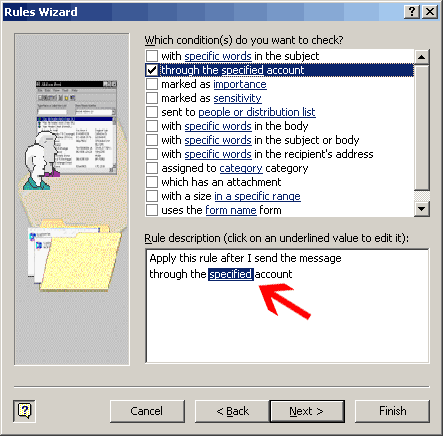
Step 15: Put a check in the box beside “through the specified account”. Then click the word “specified” as indicated by the arrow in the following image.
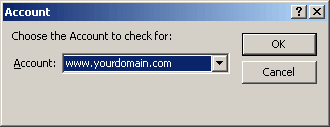
Step 16: Select the new account you just created from the drop down list, and hit OK.
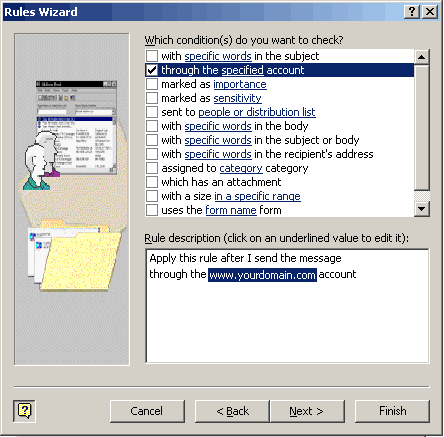
Step 17: The word “specified” in your “Rule description” should now be replaced with your new account name. Click Next to continue.
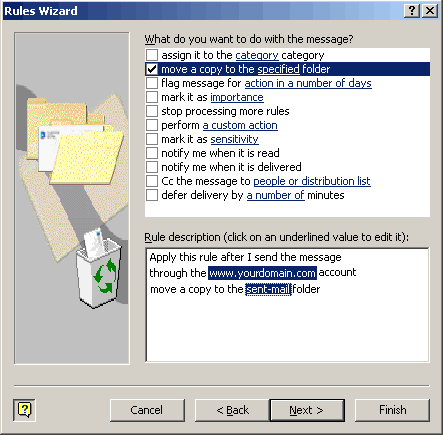
Step 18: Put a check in the box beside “move to the specified folder”. Then click the word “specified” that appears in your Rule description.
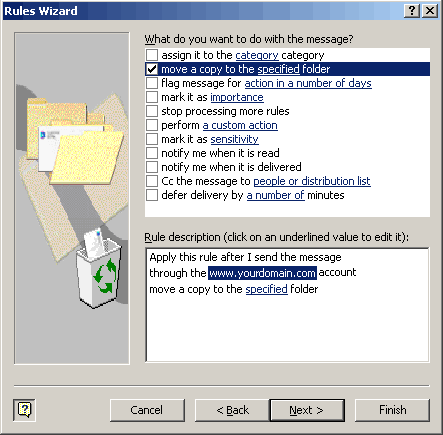
Step 19: Select the “sent-mail” folder in your new account, and click OK.
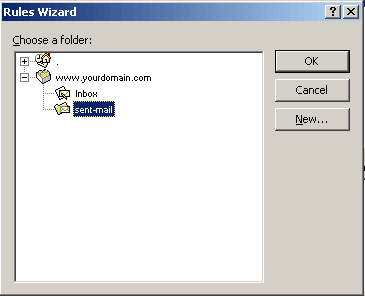
Step 20: The word “specified” in your “Rule description” should now be replaced with your new sent-mail folder. Click Next to continue.
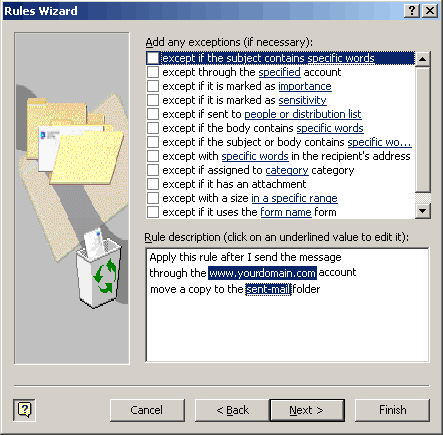
Step 21: Ensure that NO boxes are checked in the following dialog. When finished, click Next.
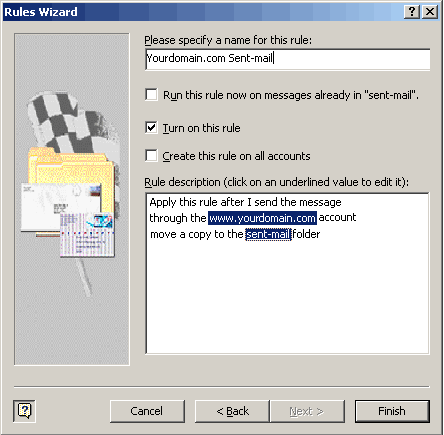
Step 22: Enter a unique name for your rule, and make sure the “Turn on this rule” box is checked. Click Finish to finish creating your rule.
Step 23: You will now see your new rule listed when you have your primary Inbox selected. Make sure the box next to your new rule is checked, and click OK to finish.
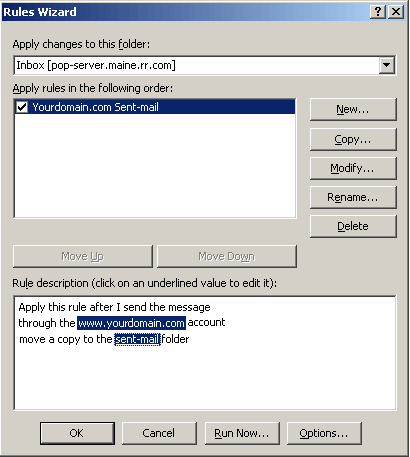
Step 24: Finished! You should now be able to send and receive email with your new account, and you should also see a copy of all sent mail being delivered to your sent-mail folder. If you have any problems please be sure that all of the steps in this guide have been completed.
 The Ultimate SEO Scripts
